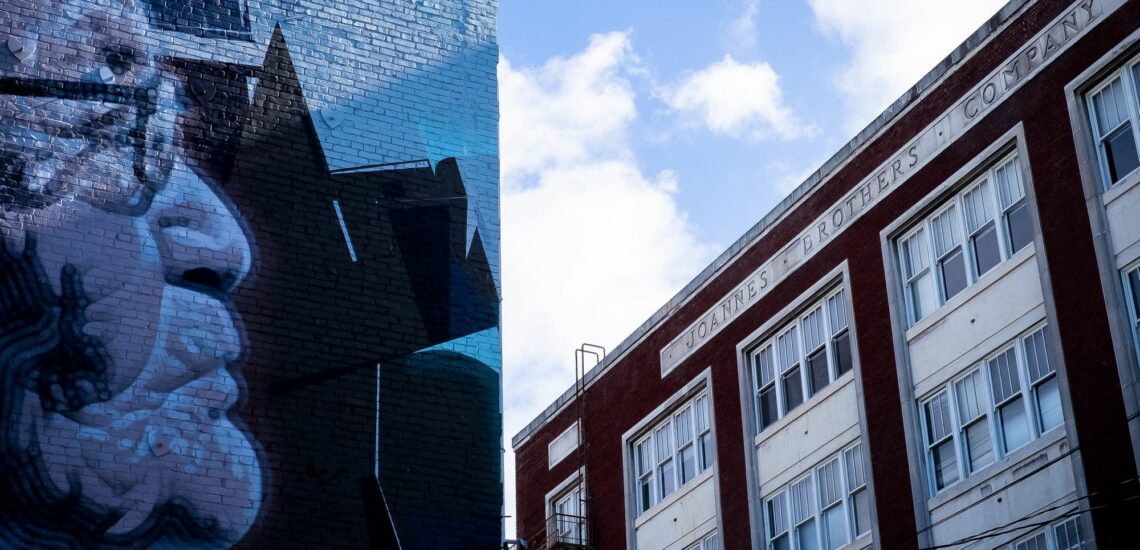
There is a pretty big difference between architectural photography and real estate photography. This is primarily due to the fact that realtors have a different expectation than hotels and home interior experts. Hence, photographers have to take a different route depending on what they are shooting.

In architectural photography, you have to shoot more than just a room. Plus, the final image is supposed to portray a certain emotion to the viewer whether it be luxury, comfort or any other that marketing experts decide. On the other hands, when it comes to real estate photography, more often than not all Realtors want you to do is pretty much stand in the corner of the room and shoot as wide as possible.

Any professional architectural photographer will tell you that shooting from the corner of the room with a wide angle lens will almost never result in a great image. I think this, perhaps is the reason why so many architectural photographers look down upon real estate photographers as amateurish or incapable.

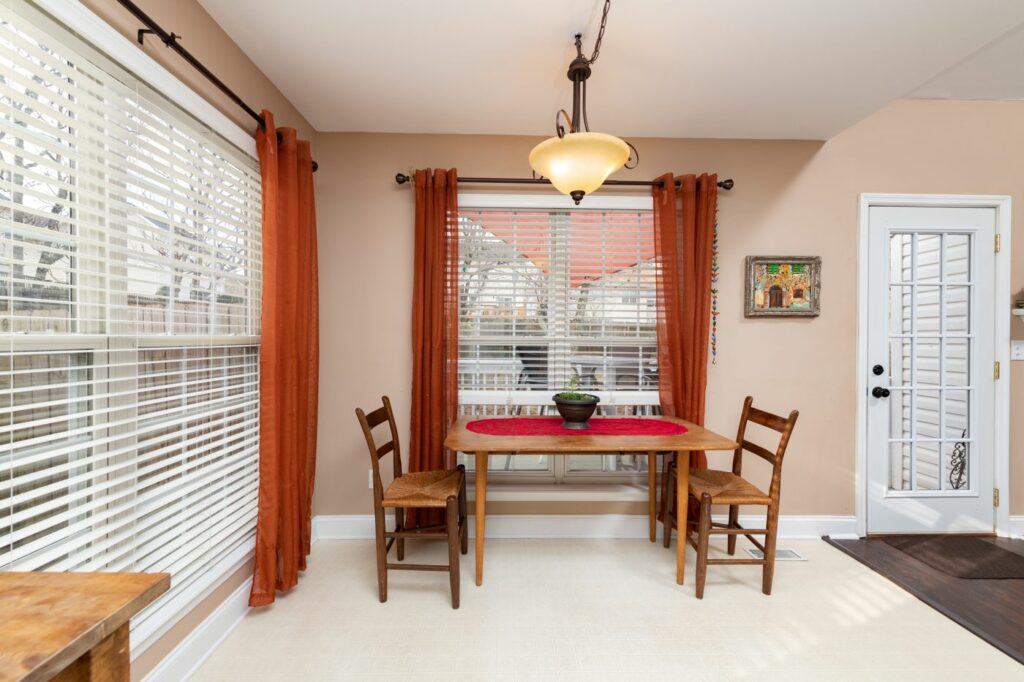
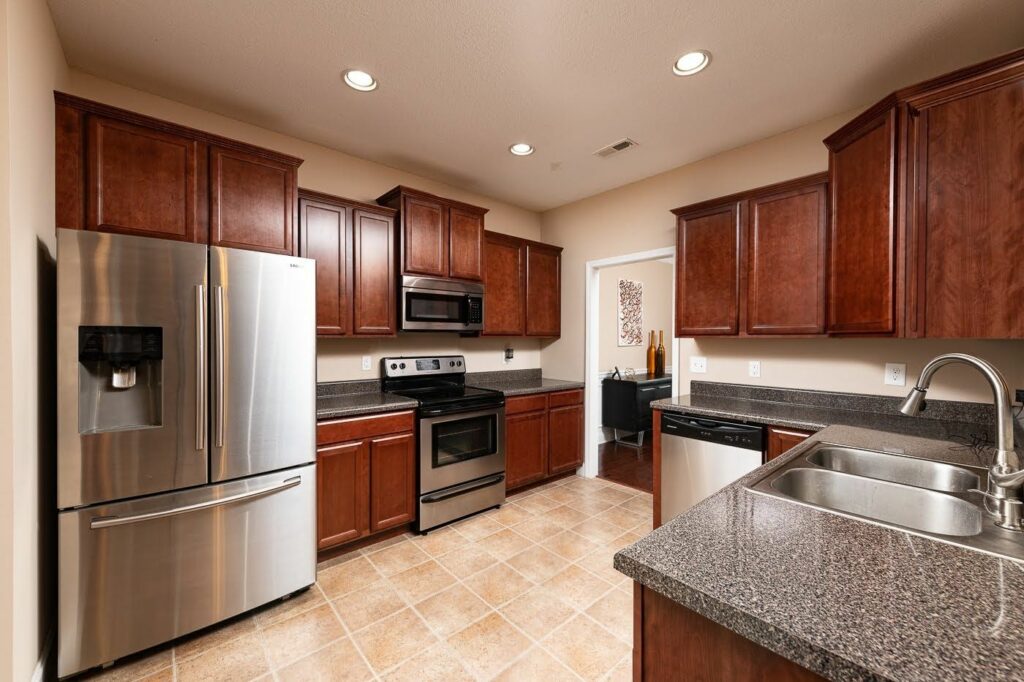
Wide angle lenses distort lines making walls and cabinets look crooked and shooting at an angle will magnify this, making it even worse. This is why whenever you see a photo that was taken from an angle of a room in magazines or other professional publications is rarely a wide angle shot. If I’m forced to shoot at an angle the widest I want to be is 24mm and even that, for me, is too wide.

Shooting wide and from the corner of the room also presents another problem. Items in the foreground of the image will appear much larger than they really are and make things in the distance appear much smaller and more cramped together.


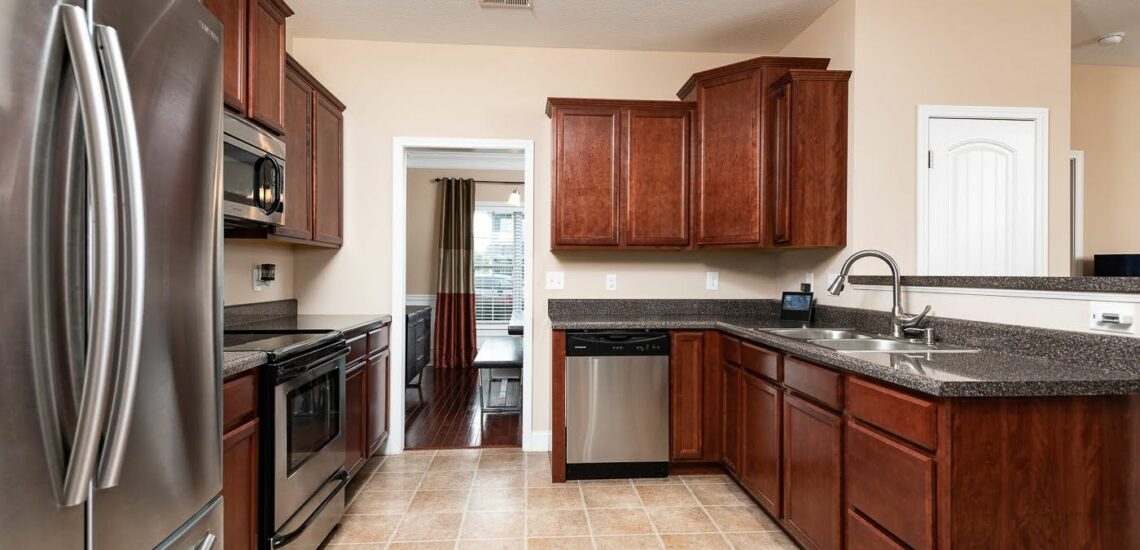
One of the biggest complaints real estate consumers have regarding real estate photos is that when they view the house in person, it’s much smaller than in the real estate photos. Of course, listing agents love this as it leads to more home showings, but it does leave a bad taste in the mouth of home buyers. It would be interesting to see a study of how effective this really is for Realtors considering the home buyer’s first impressions of the property will be a negative one…

I could go on and on about poorly executed wide angled real estate photos but I digress. The point is: In real estate photography you’re trying to show as much as the property as possible in a single image. It’s a matter of documenting space versus highlighting the best feature the space has to offer.

Blending the two

Because I have experience in both fields, both architectural work, and real estate, I understand why real estate photographers do certain things and why architectural photographers look down upon them. So who’s right and who’s wrong? What is the best way to photograph a property? In my opinion – the best real estate photographers are the ones who know how to blend the two.

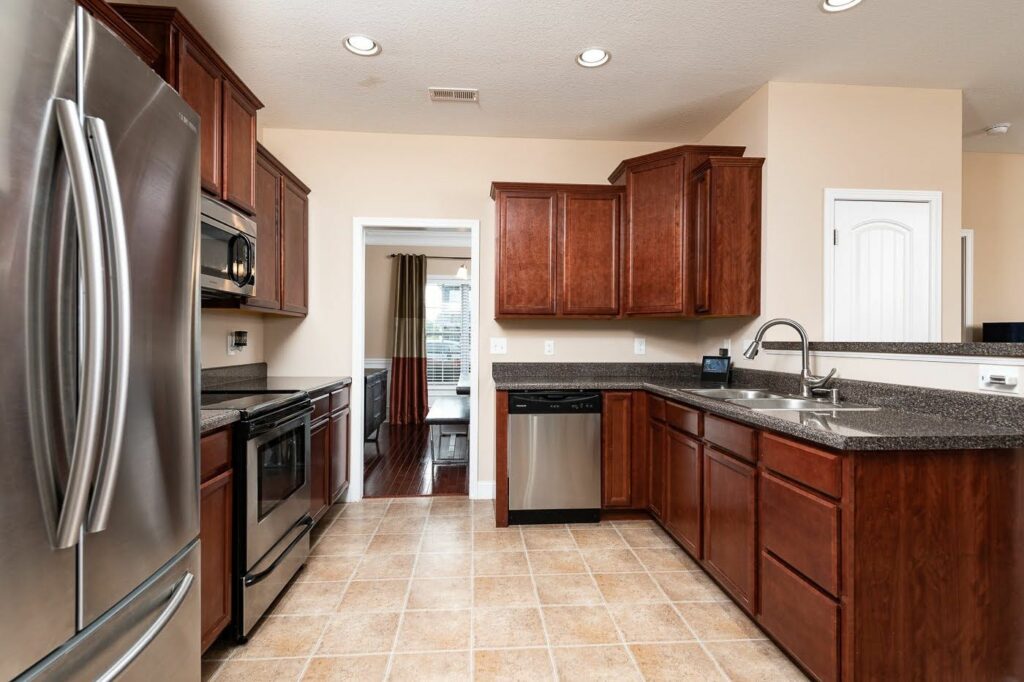
For example, I shoot a lot of wide angle shots during a real estate shoot sometimes even going as wide as 11mm! But I continue to avoid angled shots when possible showing a large portion of the room with minimal line distortion. This not only helps me capture the ideal shot but also helps me portray according to the likings of my clients.

One of the most common mistakes professional real estate photographers make is over-editing their pictures. Often times, professional architectural photographers look down upon real estate photographers believing them to be amateurish or incapable. This, I believe, is largely due to the two biggest mistakes I see all the time in the world of property photography:

  • Bad angles
  • Bad post production (photo editing)

I actually do very little to my photos when editing my real estate pictures. This is mainly due to the fact that when taking my real estate photos, I try my level best to get the perfect shots. Taking really good real estate photos on site allows me to start my editing process with a single image that is perfectly lit and well composed. I avoid Photoshop for real estate photography as much as possible and try to keep all of my post production in Light Room.

Following are the editing actions I take with every one of my real estate photos:

  • Lens Correction – All camera lenses have a slight barrel distortion. Even if you have the best lens for real estate photography in the world there will still be some amount of barrel distortion. By applying lens correction during my real estate photo editing I ensure that all the lines are straight.
  • Add a touch of sharpness – Again, a common mistake I see often (especially for those who are learning how to become a professional real estate photographer) is simply adding too much of everything. By adding sharpening way too much during the editing process the image becomes noisy, making what could be a high-quality real estate photo a low-quality image.

Those are the two editing actions I take with every real estate image and that’s it! Obviously, some real estate photos require a bit more touch up, but those two actions are a guarantee. Some of the other real estate retouching I do depends on whether the image is an interior photo or an exterior photograph.

Interior Real Estate Photography

As I prefer to use flash for real estate photography, especially for my interior shots, I have to do very little to my photographs during my real estate photo editing process. Even when using a flash for real estate photography sometimes a certain image needs a little help. Some of the common retouching I may do in order to create the best looking real estate photo includes:Adding Contrast – Never too much, but sometimes just a touch of contrast can make the blacks blacker and the whites whiter. This can help give the image depth but it can be dangerous to use in real estate retouching if you are photographing a room that has stains on the carpet or marks on the walls. By adding contrast to bedrooms that have carpet and/or wall issues you’ll highlight the defects sometimes making stains or marks appear even worse than they actually are.Noise Reduction – Rarely do I have to use any kind of noise reduction because I shoot at a low ISO, however, occasionally, if the property is dirty, this can make the house appear cleaner especially for scratched up hardwood flooring.Bring down the highlights I only need to do this on occasions when I have to turn up my flashes to brighten a room but it causes certain objects in the image to appear too hot. Again, a common mistake I see a lot of real estate photographers do is bring the highlights all the way down and bump up the shadows. Not only will this make furniture and other objects look worn, but it also makes the image flat.White Balance – This is probably the most common action I take, especially with my interior real estate pictures. Because I shoot my interior photos with primarily flash and high shutter speed, if the ceilings and/or walls are not truly white in color then the light that bounces around the room will carry the paint color around the room. This is why the best real estate photographers always shoot in raw format – never jpg. Shooting in raw format is real estate photography 101 and it allows me to correct the white balance regardless of what colors the walls and ceilings are. Even if I don’t use shoot with flashes and only use natural light for my interior photography, the same rules will apply.

Exterior Real Estate Photography

When retouching my exterior real estate images I’ll often make the following edits:Add Vibrance – This makes blue skies darker as well as bluer and grass along with trees greener. This can be dangerous however especially if the grass is yellow or the swimming pool in the backyard needs to be cleaned as it will just exaggerate the colors.Crop – When taking real estate photos it’s critical to keep the camera perfectly level so walls and lines are straight. This often means, when shooting the front of a house, that I have a lot more foreground then I’d prefer. In those cases I’ll still take the shot – knowing later in post-production I can crop the image to remove the foreground or other unwanted items that appear in the image.


Things I do not typically do

I’m not opposed to doing whatever the client asks. This is not photojournalism – its real estate photo marketing. Some real estate photography companies will outright refuse to do certain things based on some moral principle. That makes no sense to me, I’m a professional who was hired to create amazing real estate photos for the client. So when I take photos for real estate agents and get asked by the realtor to make some minor change to the image to improve the photo, I don’t hesitate at all.

With that said, here are a few things that are not a part of my standard real estate packages, but that I can do for an additional fee:Remove Carpet StainsRemove any holes in the walls and/or floors and ceilingsRemove marks such as cryons, patch work… etcChange paint colorsFix landscaping such as adding grass or removing problem areas.


In summary

In general – my real estate photo editing and retouching are very subtle. I think the difference between good real estate photos and great real estate photos is being light handed with the post-production.

The best real estate photos are the ones that require very little touch-up. I’m not one to use a ton of Photoshop actions or filters because I prefer to get things right while photographing real estate.

Let’s cut to the chase. You own some real-estate and you want to sell it. Cash is hard to come by these days and you cannot afford to hire a professional to take photos for you. What do you do? You know the fact that listings with photos sell faster and listings with high-quality photos sell even faster as well as for more money. Hence, you absolutely want to take photos and now you may just have to do it yourself. If that’s the case then buckle up and get on with it. Don’t worry. With the following tips you just cannot go wrong:

Get your hands on the right camera

While you might want to use your smartphone to take photos because that’s just way cheaper and convenient, it’s a big no-no. If you don’t have a DSLR, then ask some friends or relatives – every other person nowadays walks around with one so you might just be in luck. If you still can’t get one then just rent one. Opt for a camera with a wide-angle lens (28mm lens on a 35mm camera) so that you can capture the entire room or even home (exterior) in one shot. Moreover, do prefer the camera with optical zoom rather than the digital one because that will allow you to focus on specific features of the real estate.

Get comfortable with it

Learn the basic features of the camera. Understand why, when, and which features/settings you should choose depending on your setting and subject. Take some random photos, try out the different features, and then analyze the photos.

Brainstorm

So one of the most underrated aspect of photography is thinking before shooting. You need to grasp the fact that you just cannot walk in and snap away. Take a look at the lighting, de-clutter, stage the room if needed, understand the main subject, and figure out a way to maximize the appeal to the viewers. Go through the different possibilities through which you can provide a virtual tour to the audience.

Compose

Take advantage of the viewfinder of the camera you are using. Monitor the changes that occur when you move closer, backwards, and sideways. Ask yourself what position is the best? How can I capture the perfect shot?

By visually composing your image before taking the actual shot you will be well on your way to getting a good enough shot.

Note than it even might be worth the effort to take photographs while standing on a ladder or a stool. This is because not only can you snap photos from a higher perspective, which will be unique in itself but you can also focus on what’s more important (the room itself) rather than the ceiling.

Use a tripod or even a monopod

Nothing ruins pictures more than blurring does. When you are not used to taking photographs or when you are shooting using the zoom feature and even when you are in a badly lit setting, this problem of images getting blurred worsens even more. Taking still/stationary shots is way harder than it looks. However, there’s an easy way out of this. You can use a tripod/monopod and comfortably eliminate this problem.

Ensure adequate lightening and use angles to your advantage

Lightening is the most essential part if you want to get ideal shots. Focus on it. While shooting interiors, apart from using thee flash, switch all the lights on and if possible bring additional lightening gear to ensure that the images come out bright and visually pleasing to the eye. Also, leverage daylight as much as you can.

You may have to be particularly careful when the background is bright as in that case the subject will get lost in the shadows. When you are out in the open you can avoid this problem by tightly framing your subject and when you are inside you can turns the blinds on.

While this might seem bizarre to you but getting the right photos can be a quite difficult especially when the structure and setting of the real estate is such that you cannot position yourself properly. Shoot from an angle whenever there are shiny metal surfaces or mirrors. This will help you avoid the big white spots that appear in photographs.

Shoot more and do not leave before you get it right

Professional photographers are so skillful at their craft that they take only a handful of pictures. You, however, will need to take a lot of pictures. Improvise, move around maybe, and take pictures with and without flash. Moreover, before leaving check out the photos that you have taken. Ensure that you have got the required photos and that there is nothing wrong with them. You wouldn’t want to know later on that you forgot to take photos of one particular room or that the majority of your photos were dark or blurred, or do you?

Master Software

Once you are done taking photos, you should delve deep into the post-production process. This is where you improve your photos and prepare the end products. Be it organizing photos, cropping, adjusting exposure, brightening, or pulling out details from shadows you can do all that and much more with various softwares that are available in the market. However, do note that you should not make way too many changes in the images such that when potential buyers come in to view the property in person, they are left shell-shocked because of the difference in the images and the reality. Windows Photo Gallery for Windows users, IPhoto for MAC users, Adobe Photoshop, Pixlr, Picasa, and FotoFlexer are just some of the tools that you can use for image editing.

The gist

It is highly recommended that you avail the services of a professional photographer to get high-quality photos that can capture the attention of viewers and help your real estate sell quickly at a higher price. If you cannot do so then use the above-mentioned tips to give yourself the best possible chance of taking photos that increase your chances of making a sale.